2010-08-18

We have a boat

We made great progress today. The weather behaved wonderfully -- sunny, no wind, quite warm but not too hot. Because of the weather we decided to commit the entire day to the kayak.

In this photo we nearly completed the bottom canvas installation. The old canoe is on the ground behind me, which we kept handy for reference.

During the cooler hours of the morning Schuyler painted the rubbing strips that go on the gunwales, the bilge keels and the main keel (rubbing strip). We built and varnished the floor boards. After lunch we put the canvas on. I didn't remember actually how difficult it was from my experience in the original build. It was so much easier and straight forward then, profiting most likely from complete ignorance of the task at hand and blatant inexperience.

We managed to get all the canvas on and were hoping to have time to put the first coat of paint on but the sun was setting quickly by the time we finished the canvas. You will see from the photos that we had to move the project several times to keep the project out of the shadows and in the heat of the sun.

It is now starting to look like the lovely craft that it was intended to be. From this point on we are really finishing the canoe.

In this photo Schuyler is the proud future boat owner - somewhat amazed at what has developed before his eyes.

Some technical boring stuff:

To fasten the canvas, we decided to continue to go with Lepage PL Premium construction adhesive -- which we already used for the wood, and a regular staple gun and staples rather than copper tacks . Copper tacks are not a regular hardware item in these parts. Besides that the use of a staple gun makes the installation so much easier. I found that the few iron parts that I had on my old canoe didn't really show much corrosion, again because it was usually well stored, and such parts were well painted. In this case, there is one significant difference though. Schuyler lives in Nova Scotia where probably half of the paddling will be in salt water and half in fresh water. I very rarely ventured into briny water yet with the old boat so have no experience with the salt exposure.

Based on my professional career though, I do recall that salt water was significantly more corrosive on untreated steel. Another reason that I was not too worried about this decision was that for the old kayak the copper tacks had minimal impact on the integrity of the canvas installation. The tacks being almost completely tapered were extracted easily after a while and the glue was doing all of the work. Since we are using the very strong and effective PL Premium to hold the canvas, I suspect that the staples' main role will be in keeping the canvas in position while the glue hardens. My ony concern now will be if the staples rust if they will stain the fabric. I will be keeping an eye on the progress of this vessel and will most likely blog on this again in 10 years if blogs are still in vogue.

2010-08-17

Fiberglass and Paint Purchase


Yesterday, we also purchased the paint, and fiberglass resin, resin hardner and cloth. The fiberglass materials were found in the automotive/bodywork section at Canadian Tire. The paint is regular exterior house paint.

The original plans call for copper rubbing strips to protect the ends of the canoe which today are pretty hard to find or costly. Back in 1974, as a substitute for the copper strips, I used fiberglass to reinforce the ends of the canoe to protect it against abrasion, wear etc. and worked very well over the years. Working the material is a little tricky and takes patience and some fancy techniques none-the-less. I hope I remember what I did last time. Fiberglass cloth often had a mind of its own and was hard to pin down.

The single largest purchase so far


Yesterday we bit the proverbial bullet and bought the canvas for the boat. It is without a doubt the largest procurement for the kayak.

Sexy Girl


During our shopping yesterday we picked up some paint for the boat. Schuyler wanted a bright orange colour and at the paint store he chose a nondescript colour swatch off the wall. The store agent proceeded to add colours and mix the paint which turned out to be quite a brilliant orange.

When we arrived home we looked a the paint can more closely and noticed a label stuck to the side with the particulars of this paint and the name of the choice of colour which was Sexy Girl.

2010-08-16

Varnish is Done. Now Ready for the Canvas


We applied two coats of varnish to the finished frame, and like anything else, it always takes longer than initially calculated. Poking in and around the spars with the brush to get at all the wood and such is quite time consuming. You don't want to miss a spot now because repainting is not an option later unless one was to remove the entire skin. We completed the first coat inside since there was a threat of rain, and we would be out on errands afterwards and wouldn't be around to bring the hull back indoors in case the weather changed while we were out.

For the second coat we did it all outside. The difference in drying time was quite striking. The first coat was still tacky after returning from errands, while the second coat must have dried in less than an hour. It could be that the first coat being diluted 10% with paint thinner took longer to dry too. We used polyurethane varnish which is quite durable. In this picture is the craft after the second coat. Gee not too dramatic eh? Canvas will be on next. Since it has to be warm to put on canvas to let it stretch, we will wait until late morning tomorrow and work in the hot sun that is forecasted for then according to http://www.theweathernetwork.com/weather/caon0485/?ref=wxeyecitypagev2&var1=1073992960.

Should be good.

- Pieter

2010-08-15

Frame Done - Major Milestone

Saturday morning we finished the deck stringers which quite nicely started to show the shape of the boat. This evening we completed the bent frames of which there are four. We also added some bracing to the frame in strategic spots . For a more complete discussion on that see boring stuff below for excessive detail and ramblings, if you want to. We are now ready for varnishing and canvas. Looks like a trip to the canvas store is next.

Boring Stuff:
When flexing the newly assembled frame I noticed a strange behaviour in the movement of the frame. I was of the false belief that once the ends of the stringers, hog, and gunwales were fastened to the end-posts that the flexing of the entire unit would become fully rigid which it did to quite a large degree. What I continued to notice though was that if I pushed down or up on either end of the frame that the opposite end would go up or down in the opposite direction, sort of like one of those manual reaching devices you see in supermarkets that has a handle grip that you squeeze at the near end and which activates a grabber at the other end.

I realized then that the stringers and frames not including the end sections between either end-post and the next immediate frame, actually acted like parallelograms and moved a bit and the stringers are not entirely rigid and will also flex. To reduce this motion further, we added cross braces to stringers in one section between frame 8 and bent frame 9. This is shown in the second picture. This should solidify the structure much more however, ideally to make the structure fully rigid would require these types of cross braces on all spaces between the middle stringers and frames. That will make for considerably more work and time delay which we really can't afford right now.
What this will hopefully do is stop the transfer of motion from one end to the other. What can still happen is the flexing between all the other frames, although because the joints are glued and screwed and thus will resist any torsion in the joints this should be much reduced.
Tomorrow when the glue will have set, I will see if the aforementioned behaviour has stopped or at least diminished.

2010-08-14

About the Screw Heads Breaking Off

You will recall that we bought two packages of 100 screws 1" long at the start. We noticed that the quantity in that size is getting low. So on my way to the farmer's market in North Gower, I dropped in to our local Hardware Store - Perkins Lumber and picked up another package of 100 screws size 6 guage and 1" long.

This screw is of a different design than the screws purchased earlier.

In the first picture is the first screw type that we bought where the screw thread continues the full length of the screw right up to the head. It has no shaft.

The second screw type as shown in the second picture has a short section of shaft between the thread and the head.

At the start we found that with the first screw type we often broke the head off the screw even when screwing it into a countersunk hole and it happened before the head made contact with the wood. It could be because of the heat difference between the head and the shank since the screws got quite hot and the screwdriver could keep the head cold. It is more likely because of the poor design where the neck is very narrow at the base of the screw head, or a combination of both that and the heat. With the new screw style intuition says that it should perform better since the break was always right below the head and that part is now better protected. Also The later design allows the screw to grip more the fastening wood and less the part that is being fastened.

See comments below for discussion on an effective solution.

2010-08-13

More Adhesive, Boat Safety Kit and other Purchases

We were approaching the bottom of our tube of PL Premium Construction Adhesive, so felt it prudent to replenish the stock soon. On an errand for other stuff, we stopped in at the Canadian Tire Store -- a veritable Canadian institution. As usual we also saw some boat stuff that we knew would be required and the sales were good so went ahead and made the purchases.

We bought an Emergency kit which I don't own yet, but is now compulsory aboard all boats operated in Canada. Until now, since the rule came into effect we have rented canoes which were supplied with kits. This equipment was on sale at about 60% off, wowzers!

The upper photo on the left shows the entire kit which is a yellow bailer with a blue lid. Besides the bailer it includes: signaling devices including a whistle, a waterproof flashlight and SOS Mirror (the silvered lid); marine rope and float to throw at someone to reach them, knock them out or get their attention. The kit contents as displayed in the second photo.

We also purchased some stainless steel 10 gauge pan head 1 1/4''and 1 1/2'' screws; line (nautical term for rope) for tying the kayak; two waternoodles -- more on that later; and two PFDs (Personal Floatation Devices or life jackets) on sale at 60% off -- more on that later too.

All Bottom Stringers Are On


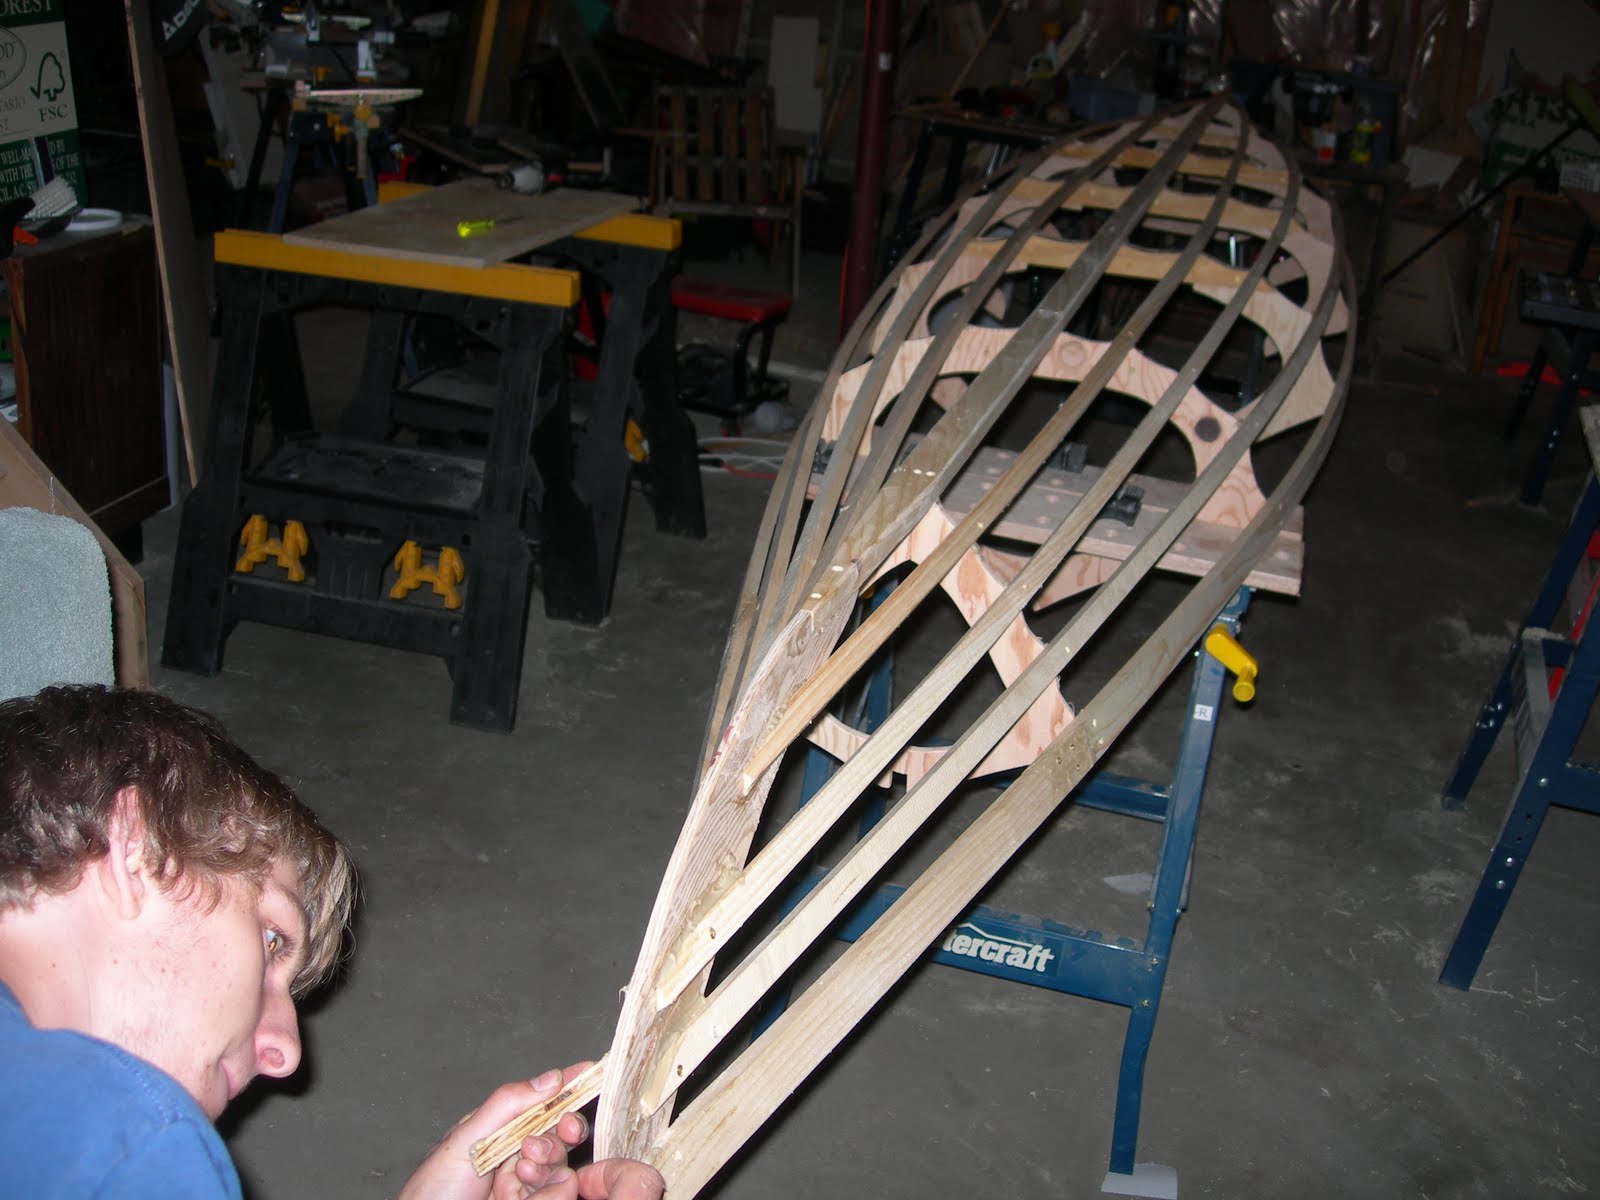
All bottom stringers are properly fastened on today. Since the glue is a gap filler as well as an excellent adhesive, it is somewhat forgiving in joints where the meeting surfaces are not exactly flush. The resorcinol glue that I used back in the 70's had much more of a watery consistency, was considerably less forgiving and the surfaces had to meet with a minimal gap. Aren't technology and new building materials great. In this picture Schuyler is doing the final touches to the joint were the stringer fastens to the stem post.

2010-08-11

Ready for Bottom Stringers

Gunwales were done last night. Schuyler is taking the sharp edges off the gunwales with a plane and sandpaper to fit the canvas. We are now ready to take it off the plank.